Branch fittings anyone? They are
a weird one I’ll tell you that, especially the authoring part for routed
systems.
I needed flow meter fitting
authored and ready to drop from the library so I downloaded the .sat part from
GF’s website and saved it in ipt format.
Before you go to authoring the
part you need to modify it a bit.
1. First you need to add a mating
point where the fitting connects with the pipe.

2. Then you need to create the
pipe axis. For this I have first created a sketch where I have drawn a circle
being the O.D. of the pipe and constrain it tangent with the mating point.
Then you can create an axis that
will go through the center of the circle perpendicular to the sketch plane.


3. We also need to create a
cutting profile if we want the pipe to be cut out by our fitting.
Use the pipe axis created above to
create a plane parallel with the top face of your fitting. Add a circle or
project the existing pipe ID edge as your cutting profile.

Now you can go to authoring tube
an pipe.
On the Type drop down list choose
“Branches” and set 2 the number of connections.
My fitting is a special size 1.26”
flanged fitting so first End Treatment is Flanged, of size 1.26in. Use the
upper circular edge for your Connection Point and Axis.

The second Connection is of type
Welded and because it’s a one size fitting I will have M150 in both Min, Max
Size.

Use the work point created for
the mating point and the work axis for the pipe axis. Finally select the circle
on the cut profile sketch and mark if to cut the mating pipe or not.
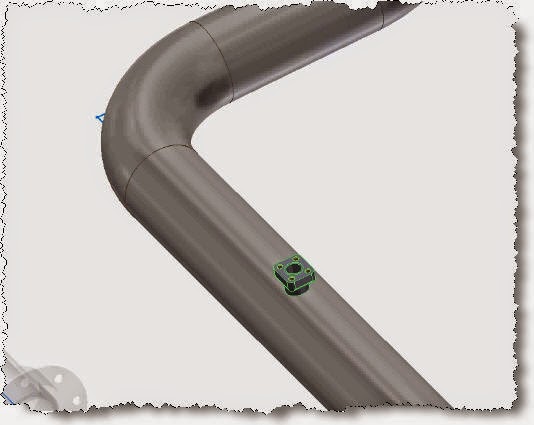
Click ok and turn the visibility
off for all work features and sketches. Here is the end result once you drop the fitting on top of the pipe.

I have managed to do a post every week (sometimes more than one) but haven't been able to make videos so I've decided to do one for this post.Here it is:
ADS
No comments:
Post a Comment