Showing posts with label branch. Show all posts

Friday, 21 August 2015

TP Branches

I’ve already showed you how I do my branched here, but I have a different solution today.

                As you are aware you cannot connect a third line where two are already connected and the error you will get from Inventor is: “Branches not allowed in routes”. Well now, we already proved that it's possible and here I will show you a different, and in some aspects better way.

                As you try to connect another line where two are joined into a node the route goes into violation mode and it’s partially locked for editing until you fix this error by deleting the segment or removing the constraints that hold it all together.

                The alternate solution is to use Coincident Constraint but not as you might expect, by connecting the 3 nodes together. Instead constrain the node to the line twice and you simulate a node to node constraint but without Inventor seeing this as a branch.

                  Start the Coincident constraint, and select the end of the free line. Choose one of the fixed lines for the second element of your selection.

                Continue with Coincident Constraint by selecting the node on the fixed lines and then select the free line as your second element.


                This will in fact simulate a connection between the nodes but without generating a route violation error.
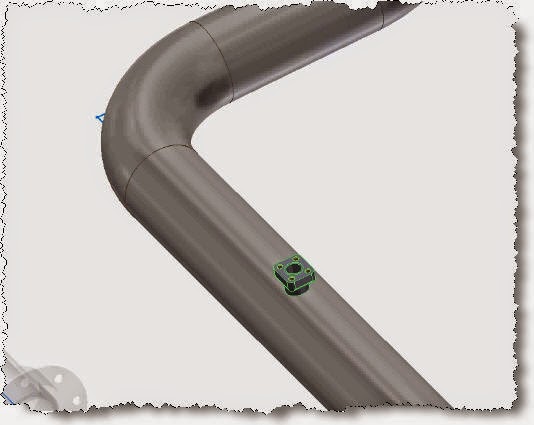
                When you place a fitting like the tee in the line the pipes are trimmed automatically to the engagement distance. For the free node (open ends) you can choose Trim/Extend Pipe from the contextual menu and set a manual value. Those of you that follow my blog and videos know that I like to import parameters with preset values for how much space a fitting will take, like valves, tees or elbows (in my case they take same space for installment). When I use trim on the loose end branch line I am actually typing “ee” to get the engagement distance parameter value and to have Inventor automatically update it when I change size of the route.


                 If you have already connected the free line to the fixed ones you need to select the node and see if Trim/Extend Pipe is on the contextual menu. If there isn’t one click the node again and in the right click menu choose Select Other and see if there’s an option for second point, or the third. You cannot get it wrong and edit a different pipe because only the free end has this option and is allowing you to trim/extend.


TIP: From all my tests Point 2 is the free end so right from the beginning Select Other and right click when “2.Point”  shows up to get the Trim/Extend Pipe menu. This of course depends on your selection order when doing the coincident constraint.


TIP: Sometimes when populating a route it will complain that it’s intersecting with itself and you need to edit the route and allow for gaps before connecting the points. This goes against my rule to populate the routes at the very end but the solution is to create a small segment, step up and populate and then remove the segment and do your normal routing. The error only occurs the first time you populate a route. If the route has been populated once it can run intersect it as much as you can and you won’t have an error.

And the video:


Later,
ADS

Wednesday, 8 April 2015

Tee Branch and Route Editing


Last post on Inventor was about authoring T&P clips and today I will cover just a bit about route editing and tee branching.
After doing a quick layout and pipe laying it become obvious that the filter in the image bellow is too close to the building column. It needs to move left but there is not enough room with the route in the current state. I need to move the tee around the corner just before the discharge flange. I need to insert an elbow between the by-pass tee and the one with the sample valve.


 You could extend the flange segment and insert the tee but you would then need to disconnect/connect the sample valve as well and if you use component tagging (my post here) you will have to tag them again. What we want is to move the elbow along with the sample valve altogether around the corner.
First I will disable the building so that it becomes un-selectable, transparent ghost like. This will allow me to work around it and still visually see the impact of my changes. Now I will modify my selection filter to part priority and double click on the route end to start editing it.


 The eeg (elbow + elbow + gap) dimension right before my tee needs to increase so that I can insert a node without Inventor complaining about violating the minimum allowed distance.

 
Then I can insert a node and remove the collinear constraint so that I can pull my segments just about 90degrees before I constrain the route. Otherwise I might have the route flipping in the wrong direction therefore I will pull it a bit so when constrained it will solve a minimum move.


Now I can move the filter and remove the extra node (new socket coupling) just before the flange.

Note: The filter here is placed and constrained at the top level assembly but it’s been authored and it’s droppable as a T&P fitting.


So in order to keep the fittings you need to keep the nodes in place. If I want to move the filter and the by-pass route I will insert two nodes and delete the segment in between them. Removing the segment without adding new nodes would delete the end fittings as well (my tee).


I use this lot and it’s very good for when moving equipment. I usually insert nodes, brake routes before moving equipment because the route goes into violation mode and it becomes locked. At that point you can’t insert nodes, you can only delete segments which will remove fittings at the nodes and you can only remove constraints which is not helpful enough.
 The last thing I’ll show you today is how to add tees. In the image bellow I want to have a tee branch where the socket coupling is. There are 3 ways of doing this:

 
1 – Inset the tee at the top level assembly and constrain it. Connect your routes to it.
2 – Just like in my image drop a tee on top of the coupling and start a new route from it.
3 – My favourite method, especially when having same route size is to have one single route.
Because Inventor doesn’t allow branches you can’t connect the line end points (3 lines or more) but you can have the 3’rd line at a distance and fix it with dimensions and constrains.


So how do you create a nother line especially when route end points are conencted ? This is where you become creative and start routing at any allowed geometry anywhere in space and remove the first segment and the included geometry that Inventor adds when you start a new route segment. Then you constraint those floating segments to your node at a distance constrained in the T position.


When you finish the route you just need to drop an elbow on top of the coupling or whatever fitting you have specified in the style settings.


Maybe you were using this methods already still, I hope you found it useful. Join me next time when we’ll show you how to work with mixed route styles and how to align the 3D Ortho Tool when it’s really skewed.
And the video:


Later,
ADS.

Thursday, 18 September 2014

Authoring branch fittings


Branch fittings anyone? They are a weird one I’ll tell you that, especially the authoring part for routed systems.

I needed flow meter fitting authored and ready to drop from the library so I downloaded the .sat part from GF’s website and saved it in ipt format.

Before you go to authoring the part you need to modify it a bit.
1. First you need to add a mating point where the fitting connects with the pipe.

2. Then you need to create the pipe axis. For this I have first created a sketch where I have drawn a circle being the O.D. of the pipe and constrain it tangent with the mating point.
Then you can create an axis that will go through the center of the circle perpendicular to the sketch plane.

3. We also need to create a cutting profile if we want the pipe to be cut out by our fitting.
Use the pipe axis created above to create a plane parallel with the top face of your fitting. Add a circle or project the existing pipe ID edge as your cutting profile.

Now you can go to authoring tube an pipe.
On the Type drop down list choose “Branches” and set 2 the number of connections.
My fitting is a special size 1.26” flanged fitting so first End Treatment is Flanged, of size 1.26in. Use the upper circular edge for your Connection Point and Axis.

The second Connection is of type Welded and because it’s a one size fitting I will have M150 in both Min, Max Size.
Use the work point created for the mating point and the work axis for the pipe axis. Finally select the circle on the cut profile sketch and mark if to cut the mating pipe or not.
Click ok and turn the visibility off for all work features and sketches. Here is the end result once you drop the fitting on top of the pipe.


I have managed to do a post every week (sometimes more than one) but haven't been able to make videos so I've decided to do one for this post.Here it is:


ADS